A crochet Bunny Baby Set is a delightful and thoughtful handmade gift perfect for welcoming a new baby. This charming set typically includes items like a soft bunny hat, cozy booties, and a matching blanket or toy, all featuring adorable bunny-themed designs. Whether you’re crafting it for your little one or as a special gift for someone else, this baby set combines comfort and cuteness, making it a cherished keepsake that parents and babies alike will love.
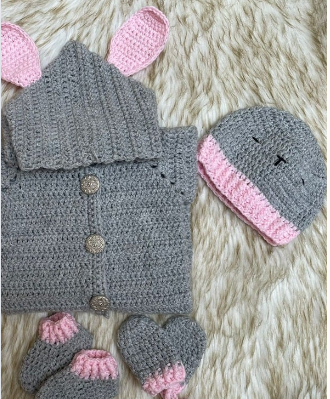
Difficulty level:
Intermediate
Materials required for Bunny Baby Set:
Baby yarn in grey and pink colors
4 mm crochet hook
Round grey buttons 3
Black Embroidery thread
stitch markers (if needed), scissors
Tapestry Needle
Abbreviations:
ch(s) – chain(s)
st(s) – stitch(es)
sc – single crochet
dc – double crochet
bp – back post
fp – front post
inc – increase
dec – decrease
slst – slip stitch
x, rep – repeat
Special Stitch:
not any
Size for Bunny Baby Set:
This pattern is for 0-3 month size.
The pattern has instructions for a cap, gloves, shoes, security blanket, and jumper.
The measurements are in inches.
Jumper:
Chest: 9
Shoulder to Crotch Length: 13
Total Length: 20
Sleeve Length: 7.5
Cap:
Length: 6
Circumference: 14
Shoes:
Length: 4
Mittens:
Length: 5
Notes For Bunny Baby Set:
- the pattern is written in US terms.
- you can follow the sequence to make custom sizes.
Romper Pattern:
Start with 60 chs. We are working in rows. Turn your work before starting a new row.
R1: skip 1st ch, 1 dc in each st across the row. (60 dc)
R2-14: ch 1, 1 dc in each st. (40, 46, 54 dc)
We are separating the front, shoulder, and back panels in the next row. Count the next row as R1.
R1: ch1, 11 dc, ch1 (1st front panel), 10 dc, ch1 (shoulder), 18 dc, ch1, (back), 10 dc, ch1 (shoulder), 11 dc (2nd front panel) (60 dc)
R2: ch1, 11 dc, “2dc, ch1, 2dc” in ch 1 sp, 10 dc, “2dc, ch1, 2dc” in ch 1 sp, 18 dc,”2dc, ch1, 2dc” in ch 1 sp, 10 dc, “2dc, ch1, 2dc” in ch 1 sp, 11 dc (76 dc)
R3: ch1, 13 dc, “2dc, ch1, 2dc” in ch 1 sp, 14 dc, “2dc, ch1, 2dc” in ch 1 sp, 22 dc,”2dc, ch1, 2dc” in ch 1 sp, 14 dc, “2dc, ch1, 2dc” in ch 1 sp, 13 dc (92 dc)
R4: ch1, 1 dc in each st, “2 dc, ch1, 2 dc” in each of ch sp. (108 dc)
R5-till required width: keep repeating the sequence of R4 till the required width on the back.
check the width of the backside. if you want a bigger size then can add more rows.
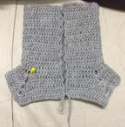
Now we are separating the shoulders and romper’s body.
Romper body And shoulder separation
R1: ch1, 1 dc in each st of 1st front panel, 1 dc in ch sp, skip the shoulder, 1 dc in next ch sp, 1 dc in each st of the back side, 1 dc in ch sp, skip the shoulder, 1 dc in next ch sp, 1 dc in each st of 2nd front panel.
R2-20: ch1, 1 dc in each st. turn.
Slst in 1st st, we are working in rounds onwards.
6 rows: ch1, 1 dc in each st across the round. slst.
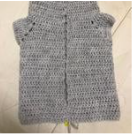
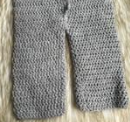
Separating both legs.
Divide the sts in two parts and mark. We’ll work for 1st leg in half sts.
R1-18: ch1, 1dc in each st across the round. slst.
Cut the yarn and Crochet 2nd leg.
Sleeves for Bunny Baby Set:
working in the shoulder sts we skipped before.
R1: (with white yarn) ch1, 1 dc in ch sp, 1 dc in each st across, 1 dc in next ch sp. slst,
R2-16: (with grey yarn) ch1, 1 dc in each st across the round. slst.
Cut the yarn and weave in the ends. Crochet the 2nd sleeve

fold the hood in half and sew it close.
Front Placket of Bunny Baby Set:
The placket will cover the right front openings only
Start working in the edge of row 20.
R1: ch1, 2 sc in each row.
R2: ch1, 1 sc in each st
R3: ch1, 5 sc, “ch1, skip 1 st” This is our 1st buttonhole, make 2 more button holes some sts apart.
R4: ch1, 1 sc in each st across the row.
Sew buttons.

Cap:
with grey yarn, work in the magic ring.
R1: 12 dc, slst. (12 dc)
R2: dc inc x 12, slst. (24 dc)
R3: “dc, dc inc” x 12, slst. (36 dc)
R4: “2 dc, dc inc” x 12, slst. (48 dc)
R5: “3 dc, dc inc” x 12, slst. (60 dc)
R6-10: 60 dc, slst.
Cut the yarn and start working with pink yarn
R1: 60 dc, slst.
R2-4: “1 fp dc, 1 bp dc”, rep across the round. slst.
cut the yarn and weave in the ends.

with black embroidery thread draw eyes in round 6, keep the distance of 11 sts between.
Draw the nose in the center of the eyes.

Booties:
with grey yarn, work in the magic ring.
R1: 12 dc, slst. (12 dc)
R2: “1 dc, dc inc” x 6, slst. (18 dc)
R3-6: 18 dc, slst.
start working in rows.
R7: 12 dc, turn
R8-10: 12 sc, turn.
cut the yarn by leaving a long tail. Fold the R10 and sew

with pink yarn.
R1: 2 dc on the edge of each row from R 8-10, 1 dc in each leftover st of R7. slst
R2-3: “1 fp dc, 1 bp dc” repeat around the round. slst.
cut the yarn.

Mittens:
with grey yarn, work in the magic ring.
R1: 12 dc, slst. (12 dc)
R2: “1 dc, dc inc” x 6, slst. (18 dc)
R3-8: 18 dc, slst.

with pink yarn.
R1-2: “1 fp dc, 1 bp dc” repeat around the round. slst.
cut the yarn.
Make a chain with pink yarn to use as tie.

Bunny Ears x 2 For Bunny Baby Set:
With pink yarn make 5 chs
R1: skip 1st ch, 4 sc, turn
R2: sc inc, 2 sc, sc inc. turn (6 sc)
R3: 6 sc.
R4: sc inc, 4 sc, sc inc. turn (8 sc)
R5-10: 8 sc.
R11: sc dec, 4 sc, sc dec. turn (6 sc)
R12: 6 sc.
R13: sc dec, 2 sc, sc dec. turn (4 sc)
R14: 4 sc.
R15: sc, sc dec, sc. turn (3 sc)
ch1, make a round of sc on the edges.
cut the yarn by leaving a long tail, we’ll later use this tail to sew ears with the jumper and bunny.
Sew 2 ears with the jumper’s hood.

Sew the bunny ears on the romper’s hood.

Catch more related Crochet videos from our YouTube channel https://www.youtube.com/@Stitchesnook/featured
You would also love this pattern: How to Crochet a Pocket Shawl: Step-by-Step Guide
